Hand mortising reel seat

This board is for discussing the repair and restoration of bamboo fly rods, makers discussion and construction techniques relating to same. Examples would be different techniques or methods used by restorationists and makers.

Moderator: Titelines

User avatar
LeeO
Bamboo Fanatic
Posts: 1607
Joined: 06/11/08 18:00
Location: Charleston WV
Contact:

Hand mortising reel seat

#1

Post by LeeO »

So I was asked for a visual tutorial on how I cut a reel seat mortise by hand

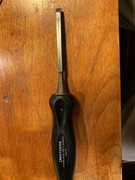
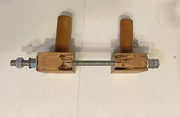
First I mark the spacer with guides for my chisel cuts using a reel foot. The width of the mortise will grow as the mortise depth increases. Starting with the same width as the foot allows corrections for tear outs and slips.

Image

Next I rough cut the mortise


Image

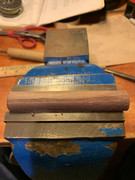
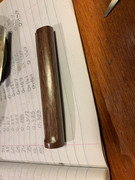
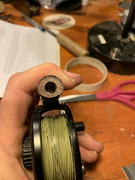
Once I have hogged out the rough mortise I begin filing the depth. I check with dial calipers to make sure I am maintaining a uniform depth. I also periodically check the level of the mortise with the reel seat to make sure there isn’t a taper and the width is uniform.

I missed a photo in my primal post


I true up the mortise edges periodically with a file
Image

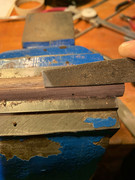
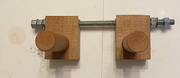
When the mortise is getting close I check the profile compared with a couple of reel foots - CFO and a Ross


Image

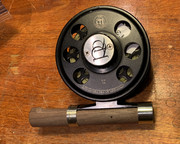
At this point I switch to sandpaper for final fitting. I make sure that the sliding band slides a reasonable distance on reel foot but not so far that it bottoms out. I also pay particular attention that the sliding band does not tilt.


Image

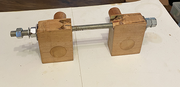
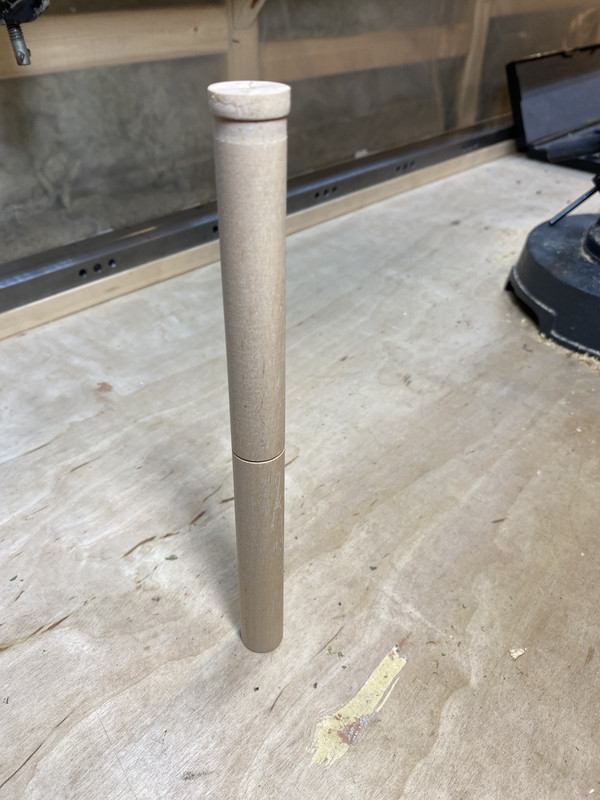
At this point the fit is close but will still need a bit of work. It is also longer than needed but I remove the excess once it is mounted on the blank by grinding it down to level with butt end of blank using a Dremel


Image

I’ll post more pics as I finish up on this seat. It is a lot more work than a router and fingernail bit, but I really like the quality of fit I get doing it by hand and it only adds a bit of time, mostly while I am finishing wraps
Image
Last edited by LeeO on 03/23/21 08:49, edited 1 time in total.
Lee Orr
304 Rod Company

http://www.304rodcompany.com

User avatar
flyman219
Guide
Posts: 264
Joined: 08/06/07 18:00
Location: Redmond, Washington
Contact:

Re: Hand mortising reel seat

#2

Post by flyman219 »

Thanks Lee!

Mike

User avatar
WIHEXROD
Master Guide
Posts: 995
Joined: 03/22/04 19:00
Location: Appleton, WI

Re: Hand mortising reel seat

#3

Post by WIHEXROD »

You can also use some 220 grit PSA sandpaper and attach to the reelfoot bottom.
Use the reel to sand the mortise area. This will give you a great fit.
Scott

User avatar
LeeO
Bamboo Fanatic
Posts: 1607
Joined: 06/11/08 18:00
Location: Charleston WV
Contact:

Re: Hand mortising reel seat

#4

Post by LeeO »

I missed a photo in my original post
Here is filing the mortise to depth
Image
Lee Orr
304 Rod Company

http://www.304rodcompany.com

User avatar
LeeO
Bamboo Fanatic
Posts: 1607
Joined: 06/11/08 18:00
Location: Charleston WV
Contact:

Re: Hand mortising reel seat

#5

Post by LeeO »

WIHEXROD wrote:
03/23/21 08:44
You can also use some 220 grit PSA sandpaper and attach to the reelfoot bottom.
Use the reel to sand the mortise area. This will give you a great fit.
Scott
That is a great idea
Lee Orr
304 Rod Company

http://www.304rodcompany.com

User avatar
PlaneOldMike
Guide
Posts: 348
Joined: 02/02/16 15:03
Location: Vancouver Island

Re: Hand mortising reel seat

#6

Post by PlaneOldMike »

Lee... thank you.

This is very helpful to me, and I’m sure many others to whom making a mortised reel seat spacer is a bit of a mystery. I will be attempting this starting today.

I have been researching the router and bullnose method, and I’ve been having difficulty finding the instructions for the holding jig construction. Your tutorial has pushed that to the back burner. If I can hand make it, then that saves me funds for other projects!


If I could possibly ask... could you picture your weapons of choice (the chisels you choose to use)?

So glad you did this. Thank you so very much Lee.


Mike.
Just a guy, trying to build a tool.

User avatar
LeeO
Bamboo Fanatic
Posts: 1607
Joined: 06/11/08 18:00
Location: Charleston WV
Contact:

Re: Hand mortising reel seat

#7

Post by LeeO »

Just a plane old 1/4” wood chisel
Image
Lee Orr
304 Rod Company

http://www.304rodcompany.com

User avatar
LeeO
Bamboo Fanatic
Posts: 1607
Joined: 06/11/08 18:00
Location: Charleston WV
Contact:

Re: Hand mortising reel seat

#8

Post by LeeO »

One coat of CA glue, sanded, then 2 coats of GG
Image
Lee Orr
304 Rod Company

http://www.304rodcompany.com

6tUc05
Master Guide
Posts: 570
Joined: 07/22/20 15:10

Re: Hand mortising reel seat

#9

Post by 6tUc05 »

Mike...

The jig is made of scrap wood. I will post photos tomorrow. A brief description of mine is it consists of a block of full 1" hard maple 2 1/2" x 4". Back 3/8" from one edge I drilled a 3/8" hole from one end to the other. These holes established the "ends" of the jig, and the edge which the hole is nearest to establishes the "front" of the jig. One (1) inch in from the back edge and 7/8" in from each end I centered a 1" hole through the block to receive a 4" long 1" dia. peg for handles. After all holes were drilled, I cut the block into two pieces measuring 2 1/2" X 2", put a dowel in each piece and placed a 9" piece of all-thread through the 3/8" hole for my "alignment mandrel". I have a star lock washer between two nuts on one end of the rod with a standard washer between the outermost nut and against the wood end of the block on that end. The nuts and lock washer are permanent on one end of the rod. I use a similar washer, lock hut, washer arrangement on the other end, and again with a standard washer between the outermost nut and the other wood end. It is the nuts and washers on this end that I remove to place an insert in between the two halves of the jig. One originally "shapes" the face of the jig by putting an insert in and "cutting" both the face and the mortise at the same time with the first insert mortising. I had to grind one side of my two standard washers back to keep my router bit from hitting them. No big deal! (These washers may be unnecessary!)

User avatar
SpringCreek
Bamboo Fanatic
Posts: 3211
Joined: 02/24/07 19:00
Location: Wildwood, MO
Contact:

Re: Hand mortising reel seat

#10

Post by SpringCreek »

Nice walkthrough of the process. Thanks for sharing.

Jim
Then as it was, then again it will be. Though the course may change sometimes, rivers always reach the sea. - Led Zeppelin, 10 Years Gone

http://www.splittingcane.com

6tUc05
Master Guide
Posts: 570
Joined: 07/22/20 15:10

Re: Hand mortising reel seat

#11

Post by 6tUc05 »

As promised last evening, here are three photos of my jig for mortising reel seat inserts with a router. I must give credit where credit is due. This jig "system" was developed by the late Tony Spezio. Tony emphasized that there is a specific "aggravation" with it's use; which is, getting the centerline of the mortise on the centerline of the insert. He noted the amount of time oft required in setting the height of the fingernail bit to "get it right" to be an aggravation. Towards this end, he highly recommended "dedicating" a router and table "exclusively" to cutting mortises. The idea being that once you get things properly set, you never need to make any changes. The depth of the mortise cut is determined the setting of the router table fence. To keep capital outlay to a minimum he recommended the inexpensive "edge routers" as the "dedicated" router, as they "could often be found on sale".

Use of the jig should be straight forward; but, to be sure: The insert is tightly secured on the all-thread between the two jig pieces, the left hand end is brought up to the spinning router bit at about the mid point on the jig (photos 2 & 3) while slightly advancing the jig to your left and pushed against it until the jig block is against the router fence, at which time the jig is moved across the bit until the bit is cutting into the opposite jig block. Voila'! You have just cut a mortise. I use a half-radius Fingernail Bit (Grizzly # C1214) for this purpose. The Venieri "cut" put on these bits by the late Bob Venieri was nothing more than a grinding back of the edge, top and bottom, of the cutters at a 45° angle, which is easily enough done.

Hope this helps.

Regards,
Frank


Image

Image

Image

User avatar
LeeO
Bamboo Fanatic
Posts: 1607
Joined: 06/11/08 18:00
Location: Charleston WV
Contact:

Re: Hand mortising reel seat

#12

Post by LeeO »

Image
Lee Orr
304 Rod Company

http://www.304rodcompany.com

User avatar
PlaneOldMike
Guide
Posts: 348
Joined: 02/02/16 15:03
Location: Vancouver Island

Re: Hand mortising reel seat

#13

Post by PlaneOldMike »

Just gorgeous Lee. I love the cap and ring too.
Just a guy, trying to build a tool.

User avatar
corlay
Master Guide
Posts: 505
Joined: 12/26/08 19:00

Re: Hand mortising reel seat

#14

Post by corlay »

If I were making commercially, I probably would resort to power tools and jigs - if anything for the consistiency, if not the speed.

But making for myself, I also make “by hand” mortises, but prefer the “Leonard style” of simply making the side of the spacer where the reel mounts more “oblong”. Your spacers, with their fine edges, are even more impressive. Ive done a few out of cork this way before, but never hardwood...

Theres something about a non-perfect, hand-tooled rod and components, with all of their bumps and warts, that just have more interest and “soul” for me...

6tUc05
Master Guide
Posts: 570
Joined: 07/22/20 15:10

Re: Hand mortising reel seat

#15

Post by 6tUc05 »

Corlay...

I think what you are referring to as the "Leonard style" is known to a woodturner as an off-center, or elliptical, turning. It is accomplished by first turning round, removing from the lathe and re-establishing new centers a minute distance from the originals and re-turning. If you do this a second time, and create new centers equidistant from the original, and on the same center-line, you can turn nice oval hammer and axe handles.

User avatar
PlaneOldMike
Guide
Posts: 348
Joined: 02/02/16 15:03
Location: Vancouver Island

Re: Hand mortising reel seat

#16

Post by PlaneOldMike »

Well Lee...

My first attempt didn’t go so well. Trying to hog to much material led to massive tear out & complete failure. But I learned A LOT.

Image

Second attempt had much better results. It ended up too flat. But it still holds a reel ;)

Image

Now I want to have some more fun. So I turned some maple down to as close to .690 as I could, and I now have 3 more tries at this :Rollin. One’s in the vise right now.

Image

Thanks Lee. It’s all your fault! :pipe
Just a guy, trying to build a tool.

User avatar
LeeO
Bamboo Fanatic
Posts: 1607
Joined: 06/11/08 18:00
Location: Charleston WV
Contact:

Re: Hand mortising reel seat

#17

Post by LeeO »

Good deal. I check fit constantly to prevent taking too much off or getting the radius wrong. Harry Boyd uses a file for his reel seats and has a much faster process
Lee Orr
304 Rod Company

http://www.304rodcompany.com

sanderson
Guide
Posts: 349
Joined: 06/29/20 19:55

Re: Hand mortising reel seat

#18

Post by sanderson »

Good info, thanks for sharing the process.

eapling
Guide
Posts: 275
Joined: 11/01/12 08:22

Re: Hand mortising reel seat

#19

Post by eapling »

Thanks Lee. Nice job with description and pics. Very helpful. I'm going to try it.

E

User avatar
oldschoolcane
Bamboo Fanatic
Posts: 1605
Joined: 04/26/06 18:00
Location: Kansas City, Missouri

Re: Hand mortising reel seat

#20

Post by oldschoolcane »

Very good work!

Post Reply

Return to “Rod making, restoration, repairs and discussion on those related topics concerning bamboo rods.”